Customer.io
Customer.io is a messaging automation platform. It has no built-in SMS channel for Interconnect-Solutions, but every Customer.io plan can call an external API with the Send and receive data action (also available as the Webhook channel in broadcasts).
This guide shows how to send SMS from a Customer.io campaign, broadcast or transactional message through the Interconnect-Solutions JSON API, and how to receive delivery reports back.
| Direction | How it works |
|---|---|
| Customer.io → Interconnect-Solutions | POST webhook action to /api/json.php with type: sms |
| Interconnect-Solutions → your system | Delivery report to the URL you pass in the hook parameter |
Before you start
- An active Interconnect-Solutions account with Activate API enabled — see API settings.
- An API key (step 1 below).
- An approved Sender ID (alphanumeric sender name) — see Sender ID. Interconnect-Solutions does not use a "from" phone number: the sender is a registered alphanumeric name (3 to 11 Latin letters and digits).
- Customer.io profiles that contain a phone attribute in international format
(for example
+380971234567or380971234567).
Step 1. Create an API key
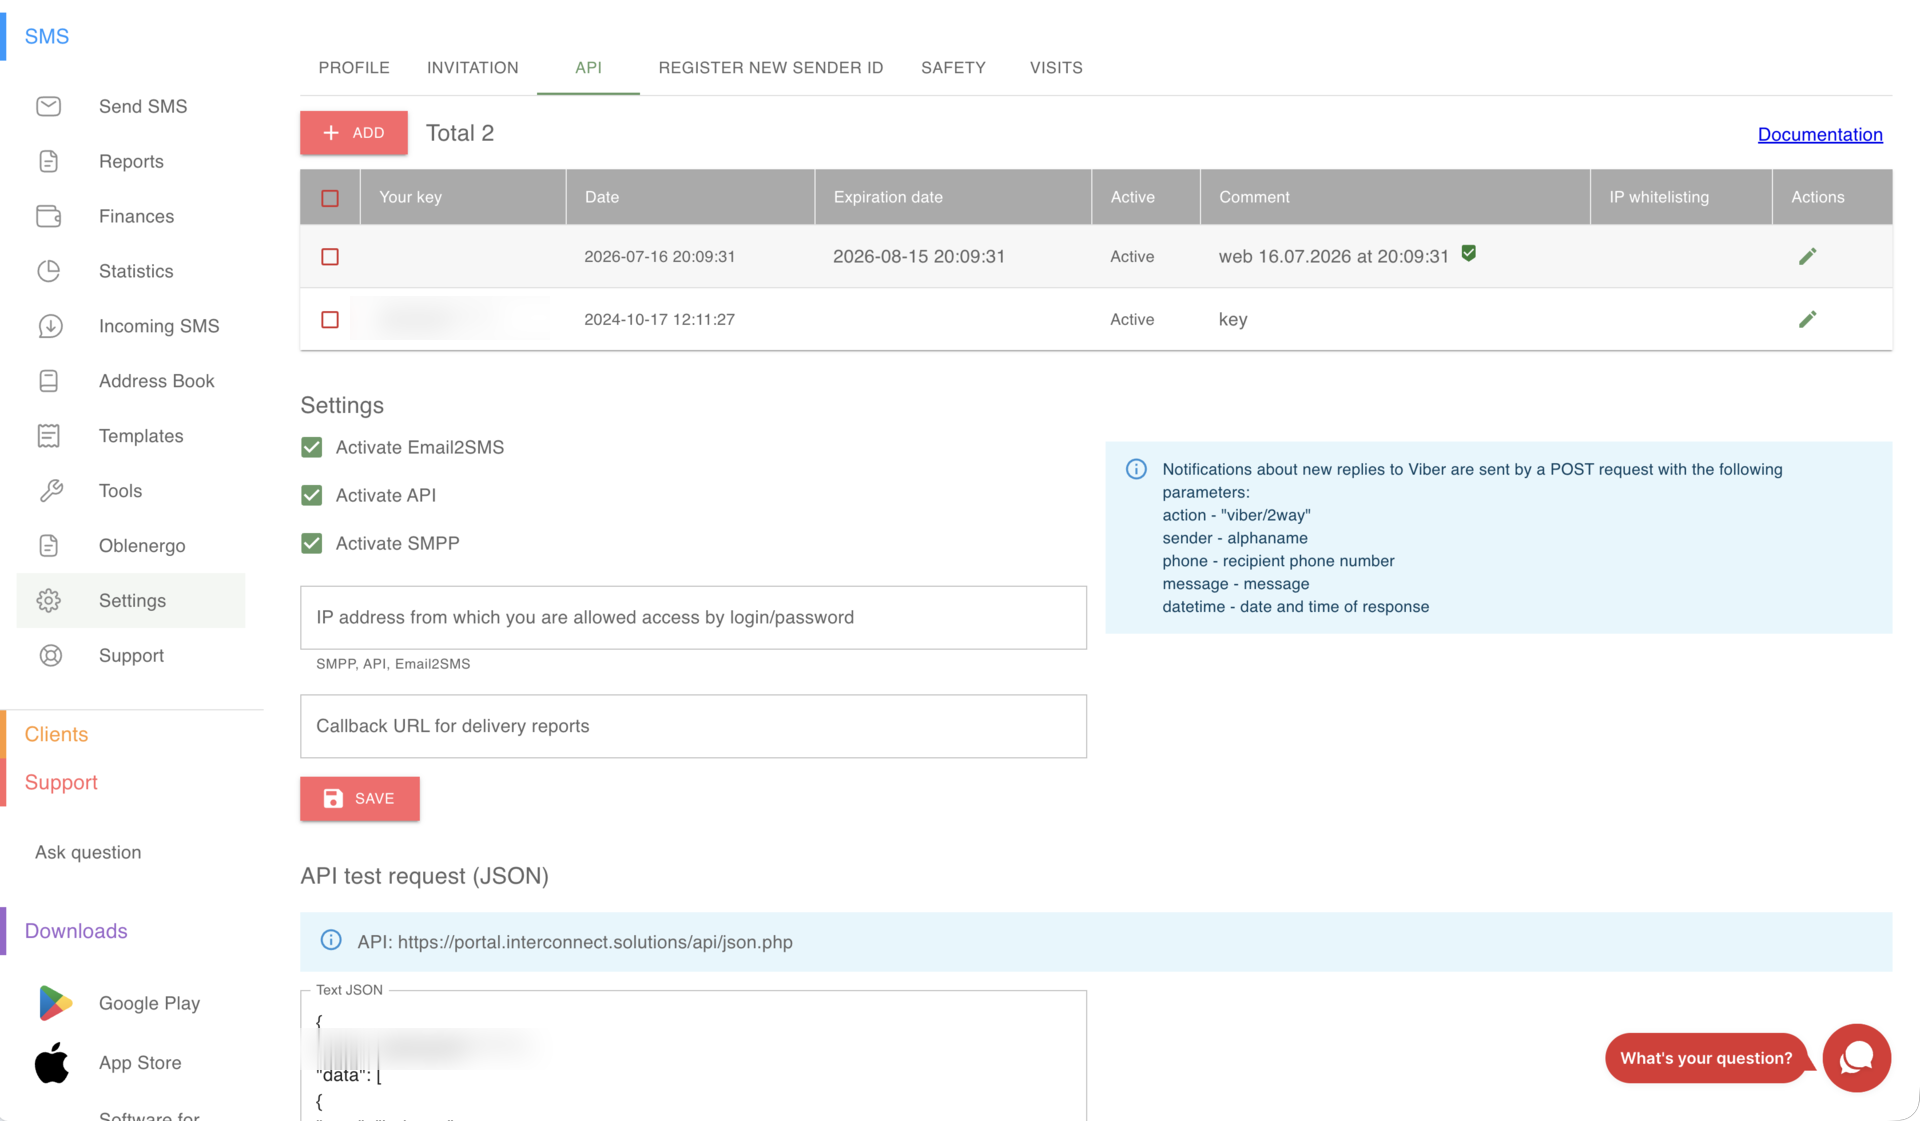
In the Interconnect-Solutions cabinet open Settings → API. The table lists your keys with their creation date, expiration date, state, comment and IP whitelist.
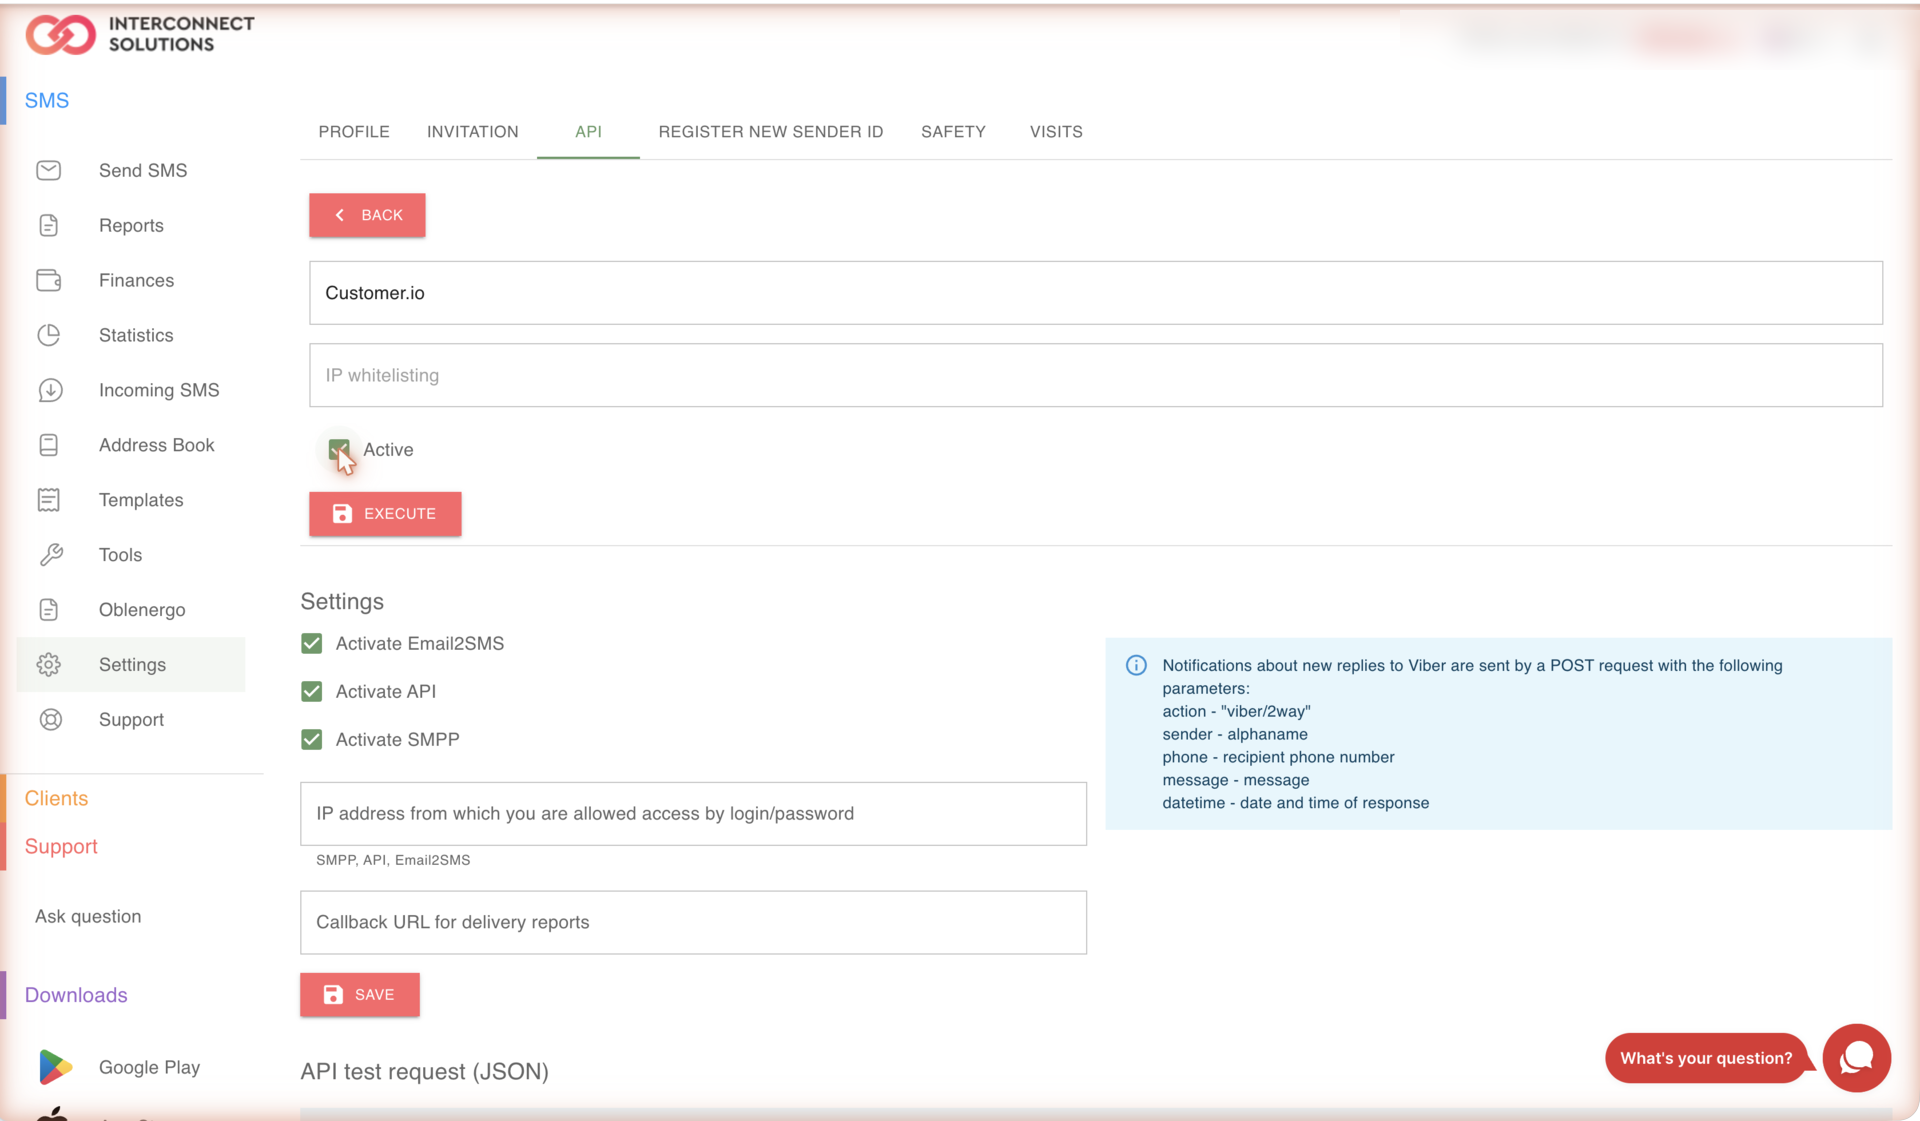
Click ADD, type a comment (for example Customer.io), tick Active and press EXECUTE.
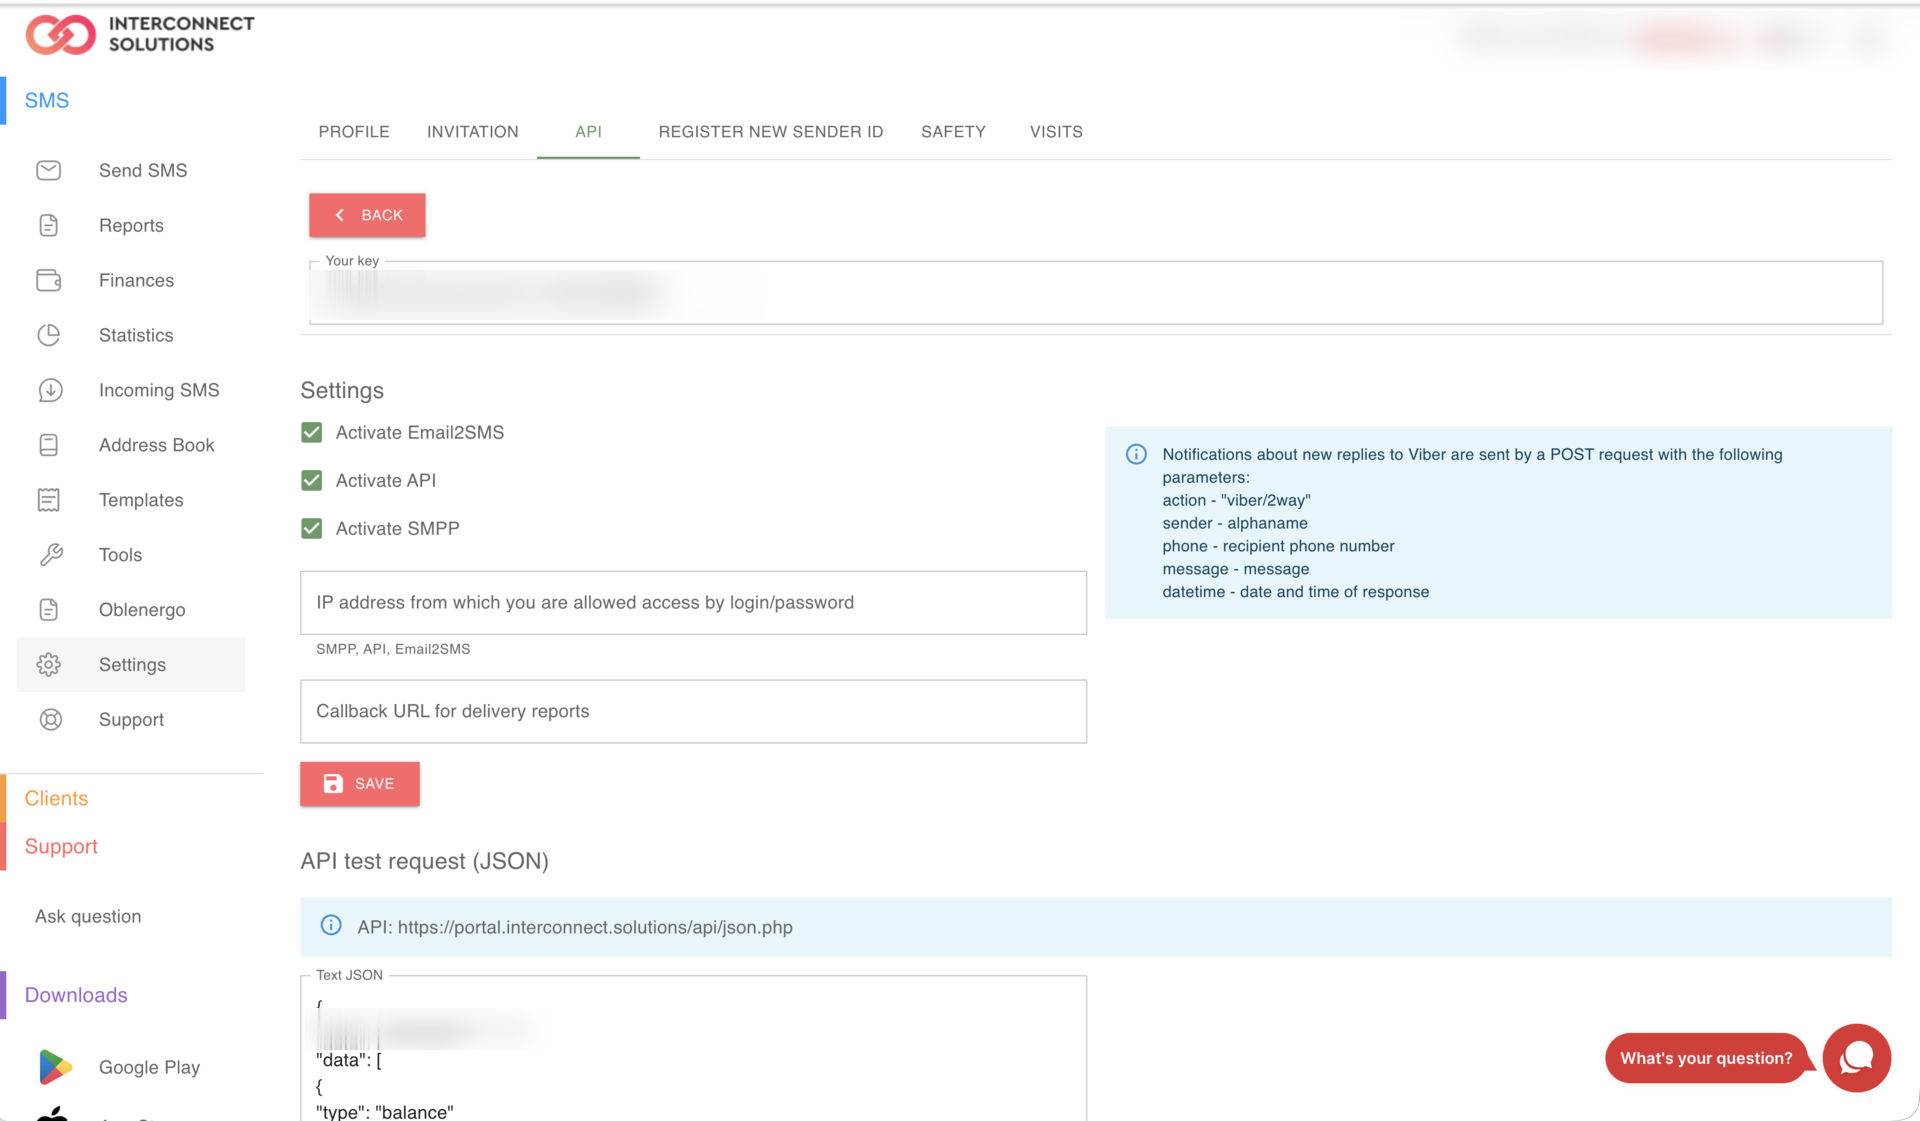
The full key is displayed once, right after it is created. Copy it now — afterwards the table shows only the first characters of the key.
Leave IP whitelisting empty for a key used by Customer.io. Customer.io sends webhooks from a
large, changing pool of egress addresses, so a fixed IP list will start rejecting your traffic
with Access denied - firewall. Use a dedicated key for Customer.io instead, so that you can
revoke it without touching your other integrations.
You can verify the key immediately with any HTTP client:
curl -X POST https://your-cabinet-domain/api/json.php \
  -H 'Content-Type: application/json' \
  -d '{"auth":"YOUR_API_KEY","data":[{"type":"balance"}]}'
{"success":true,"data":[{"success":true,"data":{"amount":10.5,"currency":"UAH"}}]}
An invalid or disabled key returns {"success":false,"error":"Access denied"}.
Step 2. Check your Sender ID
The sender method returns every Sender ID of the account with its moderation status. Only names
with an approved status can be used for sending.
{
  "auth": "YOUR_API_KEY",
  "data": [{ "type": "sender" }]
}
{
  "success": true,
  "data": [
    { "success": true, "data": [ { "name": "SMSTest", "status": "Confirmed" } ] }
  ]
}
See also: List of senders.
Step 3. Add the webhook action in Customer.io
- Campaign / journey — open the workflow, drag in the Send and receive data block and click Add Request.
- Broadcast — on the Content step choose the Webhook channel and click Add content.
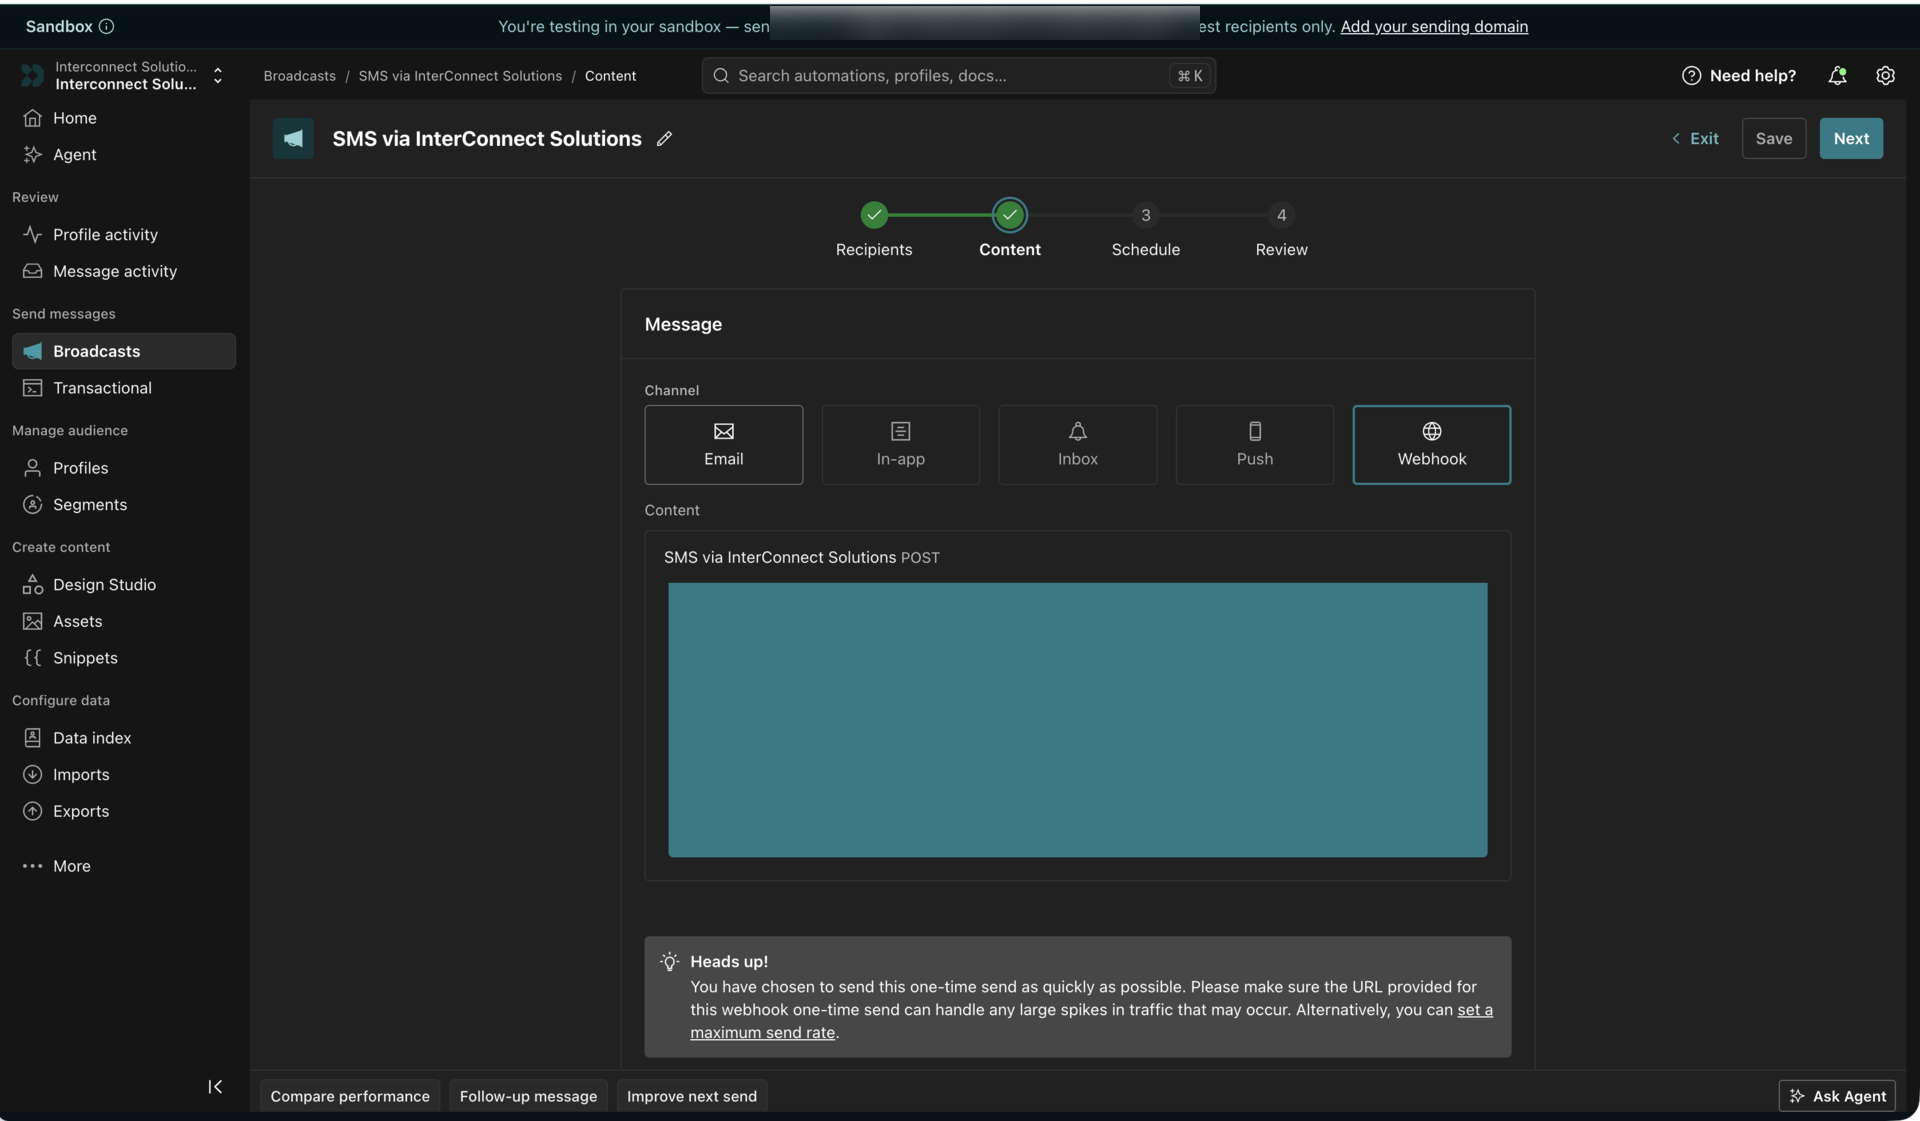
Configure the request:
| Field | Value |
|---|---|
| Method | POST |
| Request URL | <ApiUrl/>/api/json.php |
| Header | Content-Type: application/json |
Customer.io adds its own X-CIO-Idempotency-Key and X-CIO-Signature headers automatically. No
extra authentication header is required — the Interconnect-Solutions API is authenticated by the auth field
inside the request body.
Step 4. Build the request body
Paste the payload below into the body editor and replace YOUR_API_KEY and YOUR_SENDER_ID.
The right-hand Preview panel renders the Liquid against a sample profile, so you can see the
exact JSON that will be sent.
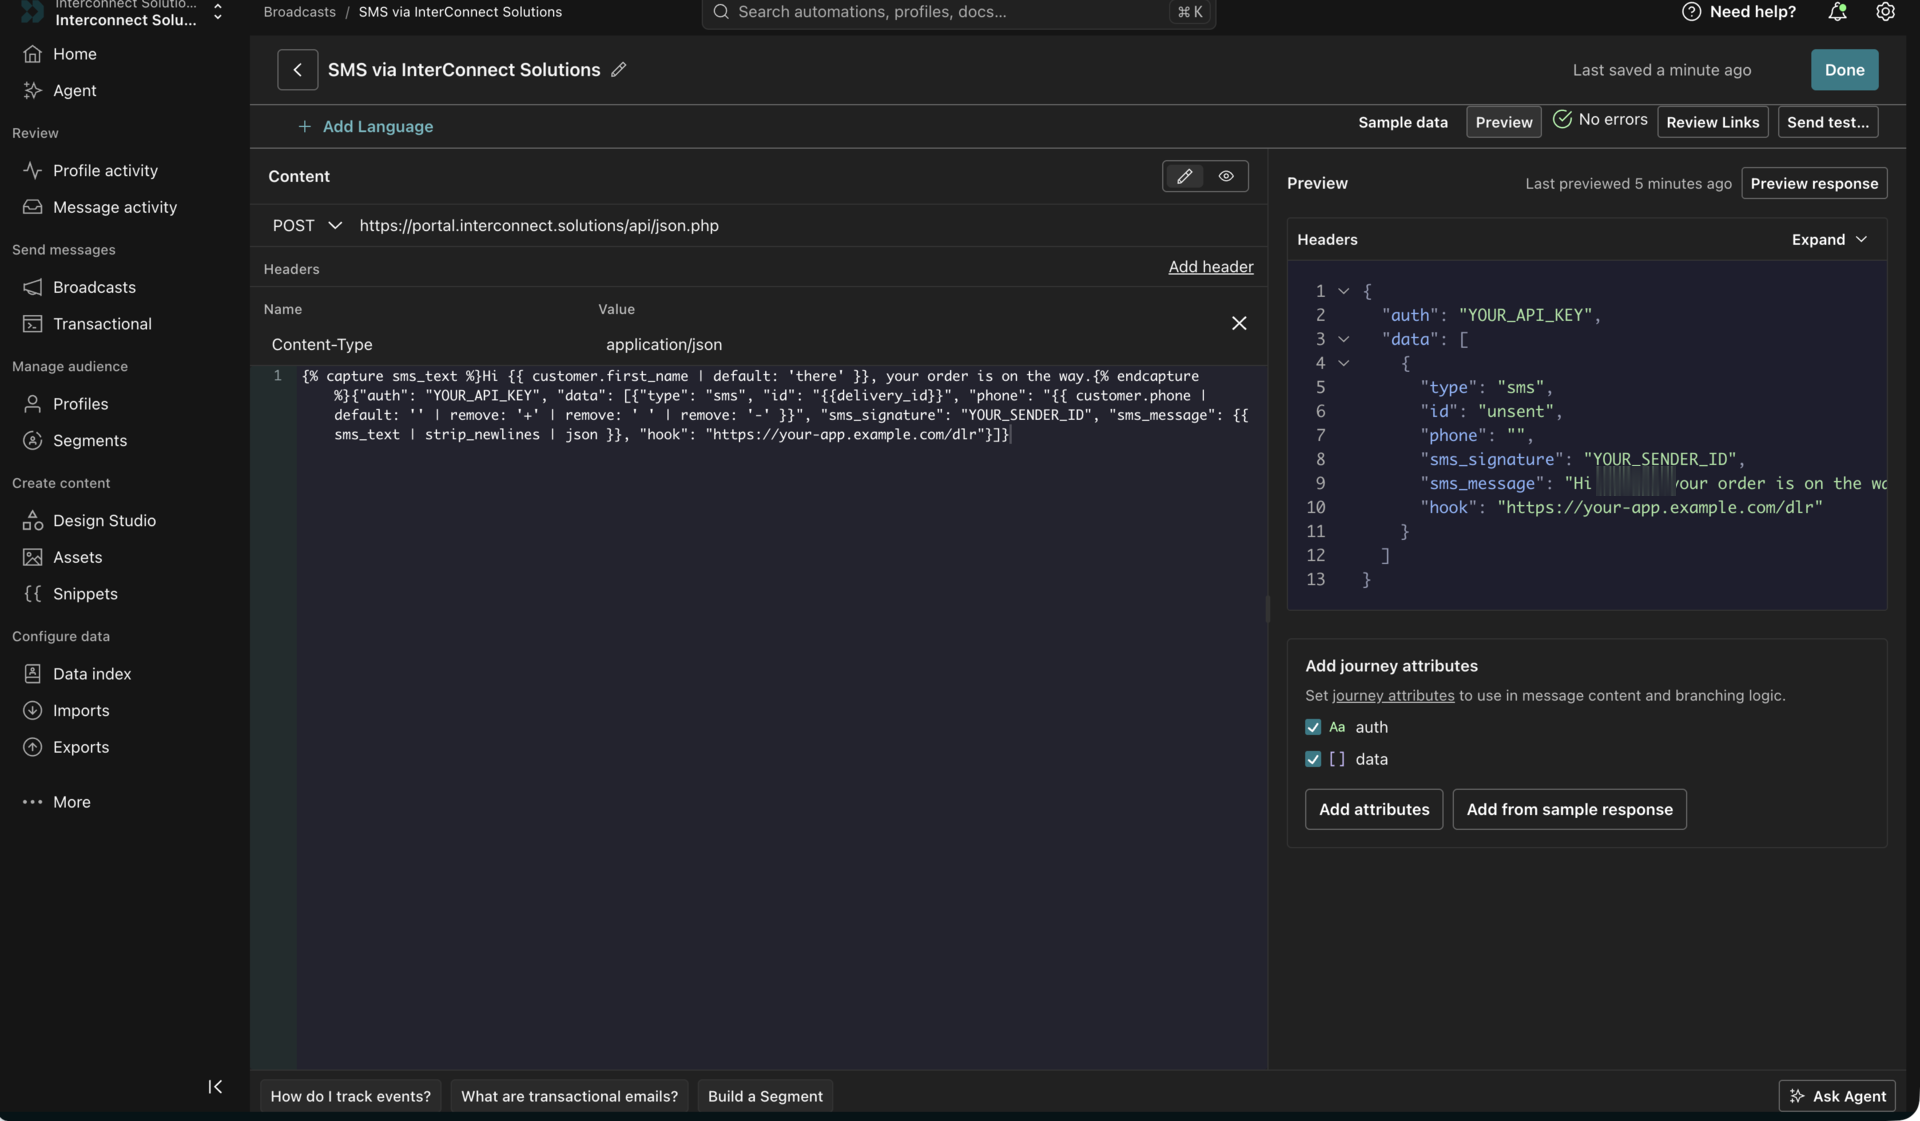
{% capture sms_text %}Hi {{ customer.first_name | default: 'there' }}, your order is on the way.{% endcapture %}
{
  "auth": "YOUR_API_KEY",
  "data": [
    {
      "type": "sms",
      "id": "{{delivery_id}}",
      "phone": "{{ customer.phone | default: '' | remove: '+' | remove: ' ' | remove: '-' }}",
      "sms_signature": "YOUR_SENDER_ID",
      "sms_message": {{ sms_text | strip_newlines | json }},
      "hook": "https://your-app.example.com/dlr"
    }
  ]
}
| Parameter | Required | Description |
|---|---|---|
auth | yes | Your API key |
type | yes | sms. Other values enable Viber, RCS, WhatsApp and multichannel sending |
id | no | Your own message identifier, returned in the response and in every delivery report. {{delivery_id}} is the Customer.io identifier of this exact message instance |
phone | yes | Recipient in international format, digits only |
sms_signature | yes | Approved Sender ID |
sms_message | yes | Message text |
hook | no | URL that will receive delivery reports for this message |
sms_lifetime | no | Validity period in seconds, from 60 to 259200 (3 days) |
short_link | no | true shortens and tracks links in the text (according to the tariff) |
unsubscribe_link | no | true appends an unsubscribe link (according to the tariff) |
The full parameter list is documented in Send SMS.
{{delivery_id}}is empty in the composer preview (it showsunsent) and is filled in at send time.- Wrap the text in a
captureblock and output it with thejsonfilter. The filter adds the surrounding quotes and escapes quotes, backslashes and control characters, so emojis, apostrophes and line breaks in customer data cannot break the JSON. - Do not use the
escapefilter on the message text — in Customer.io it percent-encodes the string (@becomes%40), and your subscribers will receive the encoded text. - Always add
| default: ''to attributes that may be missing. Customer.io treats an undefined variable as a composer error (undefined variable: customer.phone) and the request is sent with a broken body, which the API rejects withInvalid JSON. {{event.*}}variables exist only in event-triggered campaigns. In a broadcast or a segment-triggered campaign they raise the same undefined-variable error.- Send one message per profile. If you need to send to several numbers at once, add more objects
to the
dataarray.
Step 5. Read the response
The API always answers with HTTP 200; the result of the operation is in the body. The batch has
its own success flag and every element of data has a per-message result.
{
  "success": true,
  "data": [
    { "success": true, "data": { "id": "01HB…", "msg_id": 123456789, "parts": 1 } }
  ]
}
In the Response section of the webhook action click Add attributes and map the fields you want to keep on the journey or on the profile:
| Journey attribute | Value |
|---|---|
sms_msg_id | response.data[0].data.msg_id |
sms_parts | response.data[0].data.parts |
sms_error | response.data[0].error |
Because rejected messages also return HTTP 200, Customer.io will not retry them. Store
response.data[0].success in a journey attribute and branch on it if you need alerting or a
fallback channel.
Typical errors:
error | Meaning |
|---|---|
Access denied | Wrong, inactive or IP-filtered API key |
Invalid JSON | The rendered body is not valid JSON (see the Liquid notes above) |
Error in Alpha-name | The Sender ID is not approved for this account |
Not enough money | Insufficient balance |
Duplicate ID | The id value was already used by this account — it must be unique |
Please enter valid receiver phone number | Empty or malformed phone |
Receiver blacklisted | The number is in your black list or has unsubscribed |
SMS is too long | The text exceeds the maximum message length |
Operator not supported | No route to this operator |
Step 6. Receive delivery reports
Every message that carries a hook parameter produces a POST request to that URL each time its
status changes.
{
  "id": "01HB…",
  "msg_id": 123456789,
  "type": "sms",
  "status": "DELIVERED",
  "updated": "2026-08-10T12:34:56+03:00"
}
id— the value you sent in the request (the Customer.iodelivery_idin the payload above), which is how you match a report to a message.msg_id— the identifier assigned by the gateway.updated— the moment the status changed,YYYY-MM-DDThh:mm:ss±hh:mm.
The request is signed: the X-Signature header contains sha256(json_body + api_key), computed
with the same key that sent the message. Reject requests whose signature does not match.
$body = file_get_contents('php://input');
if (!hash_equals(hash('sha256', $body . $apiKey), $_SERVER['HTTP_X_SIGNATURE'] ?? '')) {
    http_response_code(403);
    exit;
}
Answer with HTTP 200. Statuses are listed in Message statuses;
the most common ones are ACCEPTED, QUEUED, DELIVERED, UNDELIVERABLE, EXPIRED, REJECTED.
An account-wide callback URL can also be set in Settings → API → Callback URL for delivery reports; it applies to all messages of the account and uses the legacy form-encoded format. Details: Webhook.
If you do not want to host a receiver, poll the status instead:
{
  "auth": "YOUR_API_KEY",
  "data": [{ "type": "status", "id": "01HB…" }]
}
Step 7. Test and go live
- Click Send test… in the composer and confirm the request. The response of the API is shown in the Preview panel — this is a real request, so a valid key will really send an SMS.
- Check the result in the cabinet: Reports → API shows the message, its price and its status.
- Switch the action to Send automatically (campaigns) or finish the broadcast wizard.
- Customer.io aborts a webhook after 16 seconds and retries
408,409,429and5xxresponses up to 11 times within about an hour. The API responds in well under a second and never uses those codes for business errors, so a message is never sent twice by a retry. - The API itself does not impose a fixed request-per-second limit. If you plan bursts of tens of thousands of messages, ask support to review the throughput of your account first.
- Add a filter on the phone attribute (for example phone exists) to the trigger or audience of the campaign, so profiles without a number never reach the webhook.
Other channels
The same webhook action can send Viber, RCS, WhatsApp or a voice call, and can chain them as a
fallback — for example Viber first and SMS only if Viber was not delivered. Change type and add
the channel parameters:
type | Result |
|---|---|
viber | Viber message |
viber+sms | Viber with SMS fallback |
rcs+sms | RCS with SMS fallback |
voice | Voice call |
hlr | Number lookup — operator, roaming and portability, without sending a message |